
GitHub has become the go-to platform for version control and collaboration among developers.
Whether you are an experienced programmer or just starting your coding journey, learning how to create a new GitHub repository and add your project to it is an essential skill.
In this step-by-step guide, we will walk you through the process to help you get started and showcase your projects to the world.
Contents
Step 1: Sign in or Create a GitHub Account
If you don’t have a GitHub account, head over to github.com and sign up for a free account. If you already have one, sign in with your credentials.

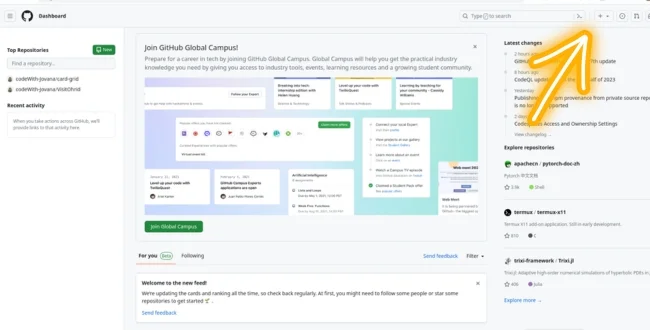
After signing in, you will be redirected to your GitHub dashboard. Here, you can see your repositories, activity feed, and more.
To create a new repository, click on the “New” button, which can be found on the left side of your dashboard or on the top right corner of the Repositories tab.
Step 3: Create a New Repository
Upon clicking the “New” button, you will be taken to a new page where you can set up your repository. You’ll need to provide some basic information for your new project:
- Repository Name: Choose a descriptive and concise name for your project. Avoid using spaces; instead, use hyphens or underscores.
- Description: Add a brief description of your project. This will help others understand what your project is about.
- Visibility: Decide whether you want your repository to be public (visible to everyone) or private (accessible only to you and collaborators). Public repositories are recommended for open-source projects.
- Initialize this repository with a README: Enable this option to create a new README file automatically. The README file is useful for providing essential information about your project.
- Add .gitignore: If your project uses specific files or directories that should not be tracked by Git, select an appropriate .gitignore template. This ensures that certain files, like log files or sensitive data, are not shared on GitHub.
- Choose a License: If you want to specify how others can use and distribute your code, consider selecting an open-source license. GitHub provides several popular licenses to choose from.
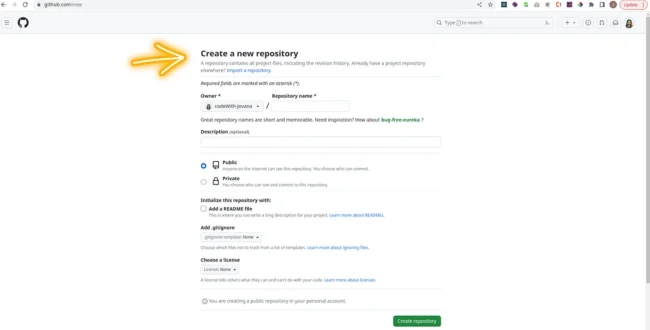
Step 4: Create the Repository
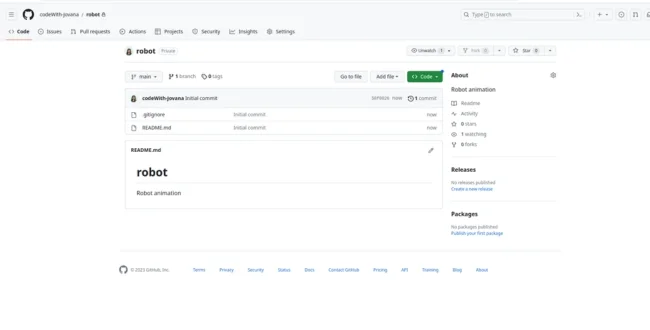
Once you have filled in the required information and made your selections, click on the “Create repository” button at the bottom of the page. Congratulations! You have successfully created a new GitHub repository.
Step 5: Adding Your Project to the Repository
Now that your repository is ready, it’s time to add your project files to it.
Using GitHub Desktop: If you have GitHub Desktop installed, open it and choose “Clone a repository.” Select the repository you just created from the list and specify a local path where you want to store the project files.
Then, click on “Clone” to download the repository to your local machine. Now, simply copy your project files into the local repository folder.
GitHub Desktop will detect the changes, and you can commit and push them to the remote repository by clicking the “Commit to main” or “main” branch button, followed by the “Push origin” button.
Using Git Command Line: If you prefer using the command line, navigate to the project’s root directory on your local machine and initialize a new Git repository with the following command:
git init
Next, add the project files to the staging area with:
git add .
Commit the changes with a meaningful message:
git commit -m "Initial commit"
Link the local repository to your remote repository on GitHub:
git remote add origin <repository_url>
Finally, push your code to GitHub:
git push -u origin main

Importance of Version Control and Collaborating on GitHub
Imagine you and your friends are working on a cool project together, like building a treehouse. Now, what if everyone wanted to add their own cool features, like a slide or a secret trapdoor? That’s where version control comes in – it’s like having a magical tool that keeps track of all the changes made to your treehouse plans.
In the world of coding, version control is crucial because it helps teams work together smoothly. GitHub is like a big online playground for this. It allows everyone to share their code, see what others are doing, and even merge their changes without causing chaos.
Here’s why version control and collaborating on GitHub are so important:
- Team Harmony: Imagine you and your friends can all see the treehouse plans at the same time. GitHub lets everyone work on the project without stepping on each other’s toes. It’s like having a superpower to avoid confusion and make sure everyone is on the same page.
- Backup Magic: GitHub is like a magic wand that keeps a history of all changes made to the project. If something goes wrong, you can go back in time to a version that worked perfectly. No more worrying about accidentally breaking things – GitHub has your back!
- Show and Tell: GitHub is like a giant show-and-tell space for coders. You can showcase your cool code, get feedback from others, and even invite new friends to join your treehouse-building adventure. It’s a place to learn, share, and make your projects even more awesome.
So, whether you’re building a treehouse or coding a cool app, version control and collaborating on GitHub are like having magical tools that make teamwork smoother, keep your work safe, and let you share your creations with the world. Happy coding!
Conclusion
Creating a new GitHub repository and adding your project to it is a fundamental skill for any developer.
By following this step-by-step guide, you’ve now successfully showcased your project on GitHub, making it accessible to the developer community worldwide.
Embrace version control, collaborate with others, and watch your project flourish!
Happy coding!


0 Comments