
In the competitive world of web development, optimizing your website’s visibility and appearance in search engine results and social media previews is vital. In this blog post, we’ll explore how to elevate your existing Next.js project by adding custom ‘head’ metadata to pages. By leveraging the ‘head’ section, you can take control of your website’s meta tags, improve SEO, and ensure a compelling user experience across various platforms. Let’s get started!
Section 1:
Locating the ‘Pages’ Folder To begin, let’s assume you have an already existing Next.js project. Within your project’s directory, you’ll find a ‘pages’ folder. This folder follows Next.js’s file-based routing system, where each file represents a specific page in your application.
Section 2:
Customizing ‘head’ Meta Data for the Homepage (index.js) For this demonstration, we’ll focus on customizing the ‘head’ meta data for the homepage, represented by the ‘index.js’ file inside the ‘pages’ folder.
Section 3:
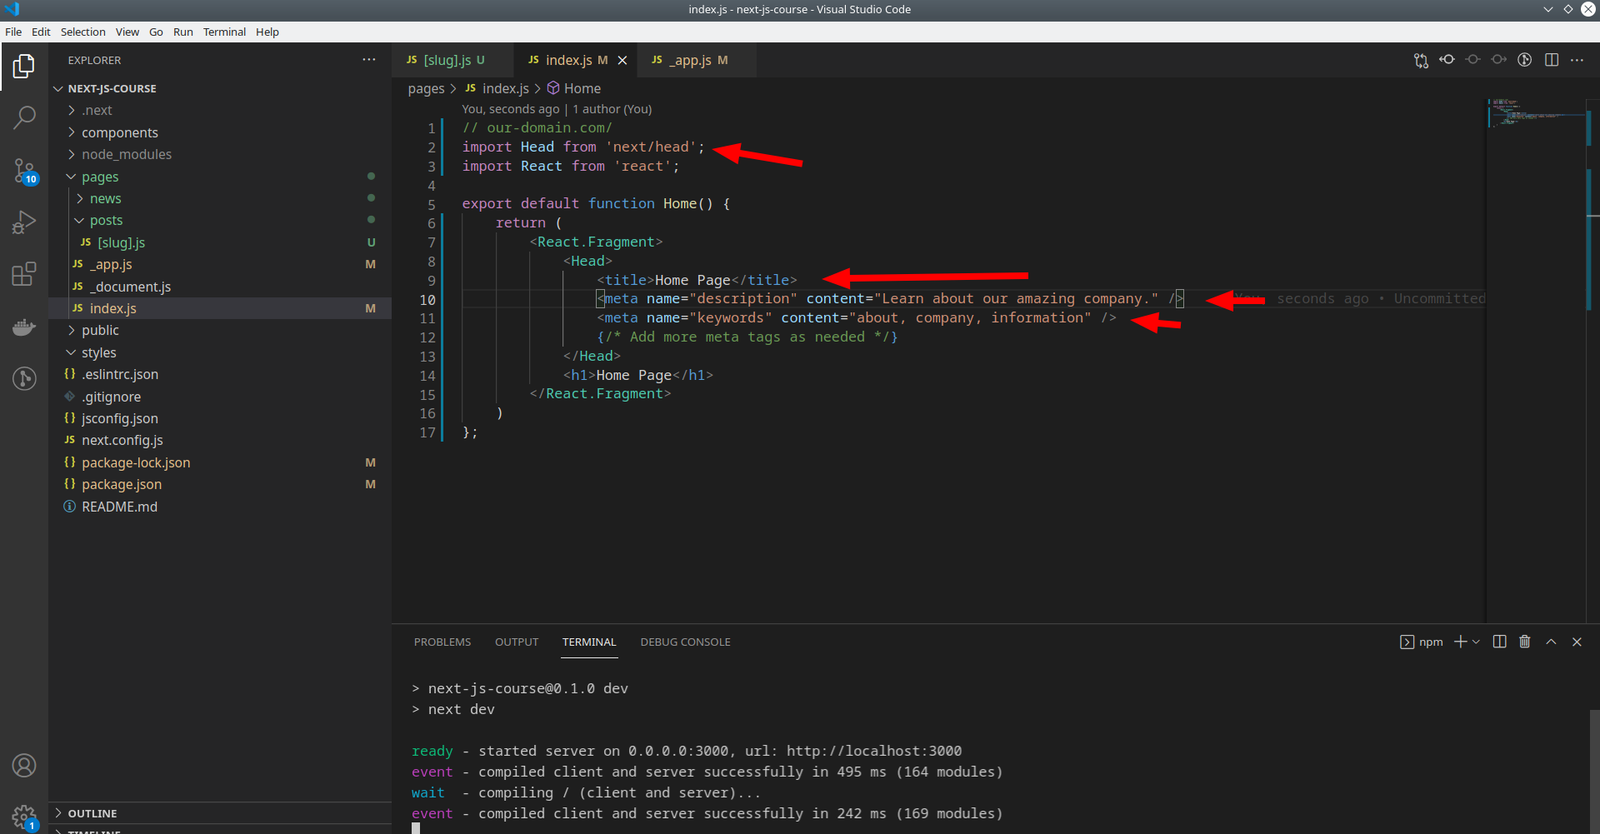
Importing the Required Components Open the ‘index.js’ file and ensure you have the necessary components imported at the top of the file:
import Head from 'next/head';
import React from 'react';
Section 4:
Adding ‘head’ Meta Data Within the ‘index’ component, we can now customize the ‘head’ section by adding meta tags. This will help search engines understand and present your website accurately. Here’s an example:
const Home = () => {
  return (
    <div>
      <Head>
        <title>My Next.js Website</title>
        <meta name="description" content="Welcome to my amazing website!" />
        <meta name="keywords" content="next.js, web development, meta data" />
        {/* Additional meta tags can be added as needed */}
      </Head>
      {/* Content for the homepage */}
    </div>
  );
};

export default Home;
Section 5:
Exploring Further Customizations Now that you’ve added custom ‘head’ meta data to your homepage, you can repeat the process for other pages in your Next.js project. By applying unique meta tags tailored to each page’s content, you enhance SEO and provide better context for search engines and social media platforms.
Conclusion:
Congratulations! You have successfully learned how to integrate custom ‘head’ meta data into your existing Next.js project. By harnessing the power of meta tags, you can improve your website’s visibility, SEO performance, and user experience. Remember to explore additional meta tags and leverage Next.js’s flexibility to customize the ‘head’ section for all your pages. Happy optimizing!


0 Comments