
In our previous post, we explored how to create a NextJS project, generate our first pages, and use the files in the “pages” folder to define routes and load components. We also learned about server-side rendering, which is a default feature in NextJS.
Creating Nested Pages
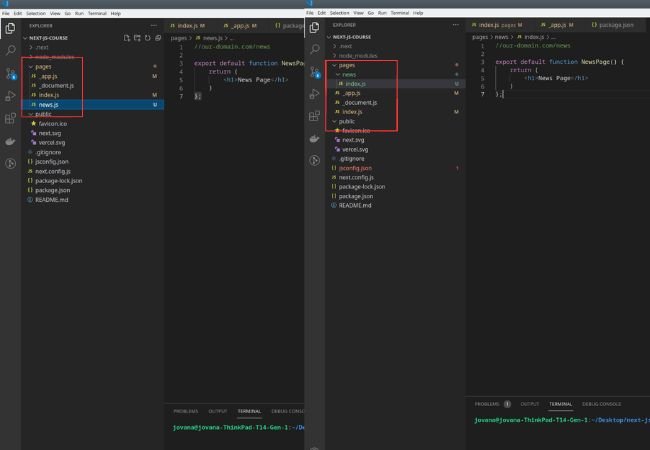
Now, let’s discuss an alternative approach to organizing routing files. Instead of storing all files in the “pages” folder, we can use nested pages and create a sub-folder named “news” and include an “index.js” file within it. This will have the same effect as having a “news.js” file in the “pages” folder. By visiting domain.com/news, the news page will be displayed. Therefore, we can conclude that sub-folders created within the “pages” folder also act as routing paths.
However, it’s essential to organize these files and folders carefully, particularly when creating nested routes. For instance, if we want to access the details of some news by visiting the “domain.com/news/details” route, we would need to create a “details.js” file in the “news” folder. To achieve this, we must also create a sub-folder that contains the root path named “index.js” and the details path.
What are Nested Pages?
Nested pages refer to pages within pages. Instead of having all your pages at the root level of your project, you can create a hierarchy where certain pages are nested within others. For example, you might have a “Products” page with nested pages for different product categories like “Electronics”, “Clothing”, and “Accessories”.
Steps to Add Nested Pages in Next.js
Create a Folder Structure: Start by organizing your pages into folders based on their hierarchy. For example, if you want to create nested pages for a blog, you might have a folder structure like this:
/pages
├── index.js
├── about.js
└── blog
    ├── index.js
    ├── post1.js
    └── post2.js
Here, the “blog” folder contains nested pages for individual blog posts.
Create Nested Page Components: Within each folder, create the necessary page components. For instance, in the “blog” folder, you would create “post1.js” and “post2.js” files, each representing a different blog post.
Linking Nested Pages: To navigate between nested pages, use Next.js’s <Link> component. For example, in the “index.js” file inside the “blog” folder, you might have:
import Link from 'next/link';

const Blog = () => {
    return (
        <div>
            <h1>Blog</h1>
            <ul>
                <li>
                    <Link href="/blog/post1">
                        <a>Post 1</a>
                    </Link>
                </li>
                <li>
                    <Link href="/blog/post2">
                        <a>Post 2</a>
                    </Link>
                </li>
            </ul>
        </div>
    );
};

export default Blog;
This code creates links to navigate to the nested pages “post1.js” and “post2.js”.
Accessing Nested Page Data: You can access dynamic data for nested pages using Next.js’s dynamic routing. For example, if you want to fetch data for a specific blog post based on its slug, you can use the getStaticPaths and getStaticProps functions.
Conclusion
By following these steps, you can easily add nested pages to your Next.js application. Nested pages provide a structured way to organize your content and improve the overall user experience. Whether you’re building a blog, an e-commerce site, or any other type of application, leveraging nested pages can help you create a more intuitive and navigable website.
In our next blog post, we’ll discuss creating dynamic pages, so stay tuned!


0 Comments