Next.js is a popular framework for building server-side rendered, React applications. With Next.js, you can create high-performance websites and web applications that are optimized for SEO and user experience. In this tutorial, we’ll show you how to create a Next.js project and what you need to get started.
Contents
Prerequisites to create NextJS project
Before we start, make sure you have the following installed on your computer:
Node.js (v10.13 or later)
npm (v6.0 or later)
You can download and install Node.js and npm from the official website: https://nodejs.org/en/download/
Step 1: Create a new NextJS project
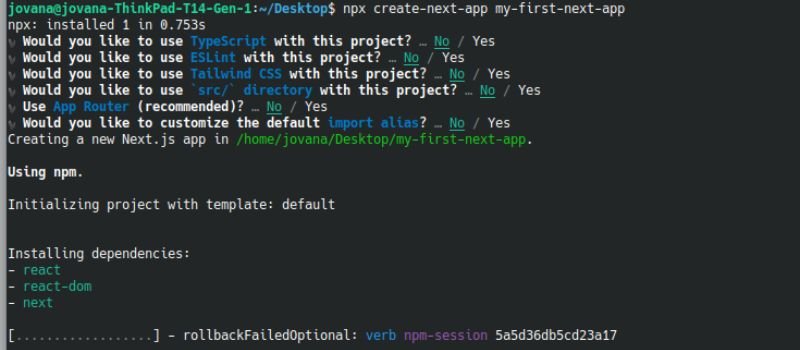
To create a new Next.js project, you can use the create-next-app CLI tool, which is a convenient way to set up a new Next.js project with all the necessary dependencies.
Open your terminal and run the following command:
npx create-next-app my-next-project
Replace my-next-project with the name of your project.
This will create a new Next.js project in a folder named my-next-project. The create-next-app tool will install all the necessary dependencies and set up a basic project structure.
Step 2: Run the development server
To run the development server, navigate to your project directory (my-next-project in this example) and run the following command:
npm run dev
This will start the development server and open your Next.js application in your default web browser at http://localhost:3000.
Step 3: Customize your project
Now that you have a basic Next.js project up and running, you can start customizing it to fit your needs.
Adding pages into Next.js project
Next.js uses a file-based routing system, which means that each page in your application corresponds to a file in the pages directory.
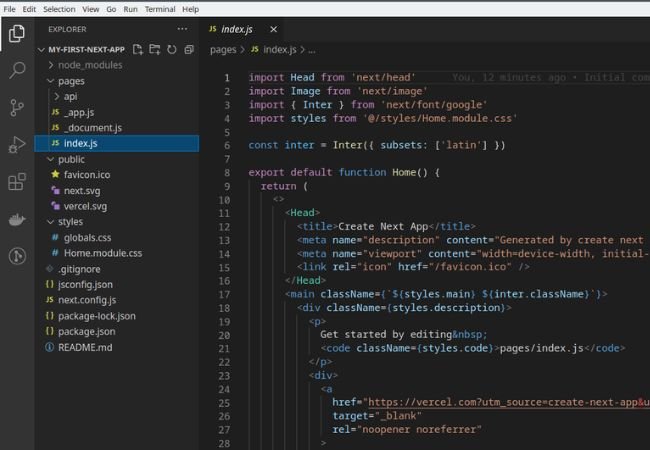
This is the initial structure of the project after creation using create-next-app:
Now let’s modify the structure for our needs. We can remove the api folder into the pages folder and from the styles we can delete the home modules style.
And to get started with next.js we will create 3 simple pages, home page, news and news details.
The index.js file contains a regular react component, and this is always the home page of the application. This is the same as standard websites where index.html is the root page. Next in the pages folder we can add a news.js file that will be loaded when we reach the-domain.com/news. Later on we will add a third file but now let’s start with these two.
In the index.js file we will create a simple react functional component.
// our-domain.com/
export default function Home(){
return (
<h1>Home Page</h1>
)
};
And also for the news page we can add one functional component with just a heading for now like this:
//our-domain.com/news

export default function NewsPage() {
   return (
       <h1>News Page</h1>
   )
};
Now, if you run the development server using npm run dev the app will be opened on localhost:3000 and we can see the heading that we wrote in the jsx file. If we add /news into the url we can see the news page/
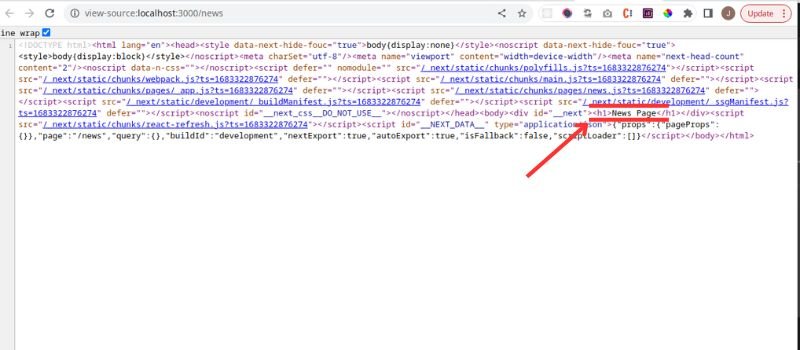
After the creation of these 2 pages, we can inspect the source code in the browser and we will notice that we do not only have a skeleton as in a react application, but we have the actual page content, which means pages are pre rendered on the server. This will prevent the flickering of the page when loading and the search engines will see the content.
This leads to the conclusion that we are using the built in server side rendering without any additional setup.
In the next blog post we will see how to create the news details page and we will learn how to add nested pages.


0 Comments